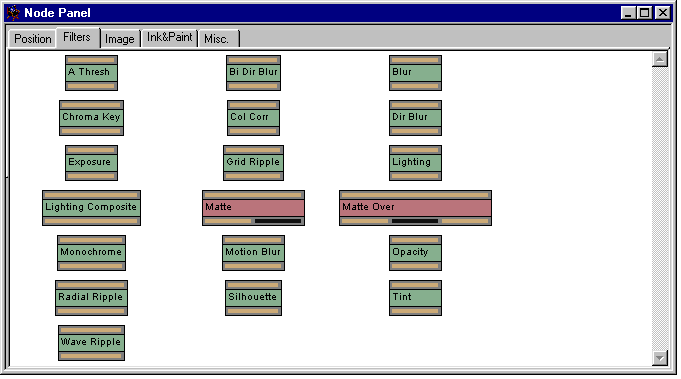
Filter elements
The Filters page of the Node Panel contains these nodes:

Lighting nodes

The Lighting node is used to set up lighting effects, such as backlighting. It composites its inputs, just like any other node. It can then blur and tint this image, which is useful for lighting effects such as a "glow" or "halo".
The node also sets a lighting style, and the exposure to use. However, it does not actually do the lighting. For this, you must connect the Lighting node's output to the input of a Lighting Composite node.

The Exposure node is exactly the same as the Lighting node, except that it cannot blur and tint its input. You should use this node if you do not need to blur and tint, as it is more efficient than disabling the Lighting node's blurring and tinting.

The Lighting Composite node composites its inputs, applying any lighting effects that you have specified in Lighting or Exposure nodes. It will ignore any elements of the scene that are not connected to its input.
See Using the Lighting Composite node.
Matte nodes

The Matte node takes an image and a matte for that image, as input, and outputs the result of applying the matte to the image. See The Matte node.

The Matte Over node takes two input images, and a matte. The matte is made hard edged using alpha thresholding; this matte is then used to remove a region from the lower image, and composite it back over the top of the upper image. See The Matte Over node.
Color nodes

The Color Correct node takes its input image and applies a color correction to it. You can choose between RGB, HSV or tint correction. See The Color Correct node.

The Tint node applies a tint to its input image. You can set the shade of the tint, and the amount it is applied. See The Tint node.

The Silhouette node makes an image black; its main use is use to color a level for use as a shadow. See The Silhouette node.

The Monochrome node removes all color from its input image, making it monochrome. See The Monochrome node.

The Chroma Key node removes a key color from the input image by making it transparent, and other nearby colors by making them partially transparent - giving an anti-aliased edge to the removed regions.
You can set the key color, the range of nearby colors that are affected, and what proportion of those colors are entirely transparent.
Opacity nodes

The Opacity node changes the opacity of its input image; again, you can set how much it does so. See Changing opacity.

The Alpha Threshold node removes all partially transparent pixels from its input image. It does so by setting an alpha threshold:
- All pixels that are of equal or greater opacity than the threshold become fully opaque.
- All pixels that are less opaque than the threshold become fully transparent.
See Alpha thresholding.
Blur nodes

The Blur node blurs its input image; you can set the degree of blurring. See Blurring.

The Bi Dir Blur node blurs its input image in two directions at 180 degrees to each other. You can set the amount of the blur and its direction. See The Bi Dir Blur node.

The Dir Blur node blurs its input image in one direction only. You can set the amount of the blur and its direction. See The Dir Blur node.

The Motion Blur node automatically blurs its input image in its direction of motion relative to the camera. It is normally used to add "motion blur" to a character. You can set the amount of the blur. See The Motion Blur node.
Ripple nodes

The Grid Ripple node ripples its input image using a square grid. You can set the position and angle at which the distorting grid is placed, the spacing between each ripple, and the intensity of rippling. See The Grid Ripple node.

The Wave Ripple node ripples its input image using parallel lines. You can set the position and angle at which the distorting lines are placed, the spacing between each ripple, and the intensity of rippling. See The Wave Ripple node.

The Radial Ripple node ripples its input image using concentric circles. You can set the center of the circles, how far the ripples have spread out from the center, the spacing between each ripple, and the intensity of rippling. See The Radial Ripple node.